We use Omnigraffle Pro to generate prototypes and wireframes from one source document. It allows us to link elements (buttons, page regions, etc.) to different pages within the same document, or to run scripts. We can then export a PDF or HTML version of our static wireframes into a clickable prototype easily.
Clickable prototypes
Here’s how that works:
1. Select an element on the canvas. In this case, it’s a tab that is kept on a shared layer.
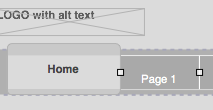
- Selecting the ‘Page 1’ tab in the header
2. Open the i inspect menu, choose the properties panel and the actions tab within that panel.
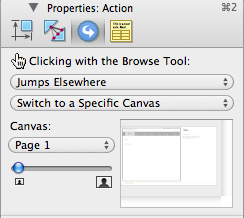
- Hold Cmd+2 and then click the blue circle with the arrow in it to see this menu
3. Now we’re cooking with gas! You can choose from all kinds of things to happen when that object is clicked.
 Choose ‘jumps elsewhere’ to simulate page to page navigation.
4. Where’s elsewhere? We’ll choose a specific canvas to target:
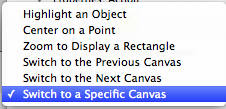
- You can tell Omnigraffle to navigate to another canvas, zoom, highlight or center on the current canvas.
Okay, that’s it. On every page that has that shared layer, you’ve made persistent navigation.
Now what? Preparing the prototype
Now the problem is what to do with all the annotations, text commentary, and page backgrounds that are included with a traditional wireframes, but are visual noise in your prototype. Turning them off on each page can be a real drag, and no one gets a good feel for app flow with them cluttering the view.
Our solution is fairly simple. First, each canvas has two layers. A ‘Notes’ layer specific to the canvas, and a shared ‘METADATA’ layer displaying page name, number, revision, and other information.
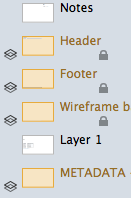
All the layers in our Omnigraffle canvas.
We make another canvas (or page) and put some buttons on it. On these buttons, we use the ‘Runs a script’ option and paste in some AppleScript:
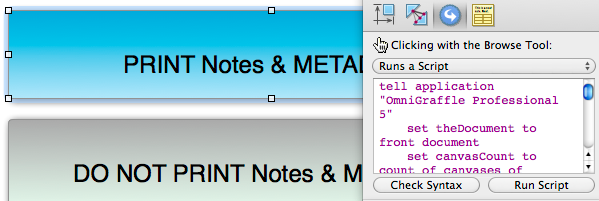
Now, clicking ‘Check syntax’ and ‘Run script’ executes that AppleScript. We don’t even have to export this page to make it work. Here’s the AS to turn on all the Notes layers and page backgrounds, for example:
tell application “OmniGraffle Professional 5”
set theDocument to front document
set canvasCount to count of canvases of theDocument
repeat with canvasNumber from 1 to canvasCount
set oCanvas to canvas canvasNumber of theDocument
try
set lyrNotes to layer “Notes” of oCanvas
set blnVisible to visible of lyrNotes
set visible of lyrNotes to true
end try
try
set lyrNotes to layer “METADATA + Brand background” of oCanvas
set blnVisible to visible of lyrNotes
set visible of lyrNotes to true
end try
end repeat
end tell
Here’s the file:
![]() fuzzy-math-template-example-1.graffle
fuzzy-math-template-example-1.graffle
Enjoy! Comments and suggestions are welcome, as always.